Technical Note:
How to Clean Optics

Removing Dust, Stains and Impurities From Optics

Dust and stains on Optics can cause scattering, and impurities on the optic surface can react with incident laser light to damage optical coatings. With proper handling and cleaning of your optics, you can prevent damage, ensure their continued performance and extend the usable lifetime of your optics.

General Tips

If it's not dirty, don't clean it! Handling optics increases their chances of getting dirty or damaged, so you should clean optics only when necessary.

Step 1. Proper Handling:

You should handle optics in a clean, low-dust, temperature-controlled environment while wearing powder-free acetone-impenetrable Gloves or Finger Cots. Did you know that human sweat is one of the most corrosive liquids that exists? Oil and debris from your hands or from used Lens Tissue can stain or damage optical coatings, so you should never touch any transmissive or reflective surface of your optic. Never re-use a lens tissue. Remember that lens tissues are inexpensive compared to the price of an optic.

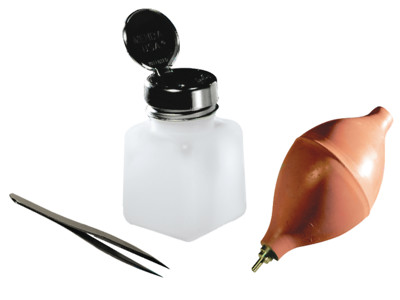
When optics are removed from their mailing or transport boxes, remember that they are very fragile.  In a clean, temperature-controlled area, carefully open the box, making sure not to damage the contents. Using gloves or finger cots, remove each optic and place onto a clean lens tissue or into an optical storage container. For very small or delicate optics, tweezers or suction tools may be useful for ease of handling. Never use metal tools to handle optics. No matter the holding method used, it’s best to hold the optic along its non-optical surface, like the ground edges. Please note that most crystals are sensitive to temperature and can crack, so always let the package reach thermal equilibrium before handling. Certain optical surfaces, including holographic and ruled gratings, first surface unprotected metallic mirrors and pellicle beamsplitters are so sensitive that any physical contact from hands or optical handling instruments can cause damage to them.

Inspect an optic for dust and stains by holding it near a bright visible-light source. Viewing the optic at different angles allows you to see scattering from dust and stains.

Step 2. Use a clean-air duster:

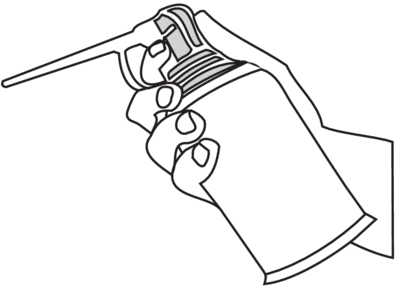
Dusting is always the first step in cleaning your optics. Wiping a dusty optic is like cleaning it with sandpaper. So always dust with a canned air duster, compressed and filtered air, or nitrogen before wiping any optic. If the dusted optic has no visible stains after you dust it, then remember: “If it's not dirty, don't clean it.” If it's still not clean, proper use of solvents and lens tissue can often do the trick.

DustCan
Wiping a dusty optic is like cleaning your windshield with sandpaper. Always blow the dust off your optic with compressed filtered air or nitrogen before further cleaning it. Never blow on an optic, chew gum, or talk while handling optics, as your saliva particles can stain the optical surface.

Step 3. Use solvent and lens tissue:

The way to use them depends on the optic, but always wipe slowly and clean the edges first.

Glass-cleaning solvents will streak, and tissue paper or a t-shirt will scratch, so always clean optics with reagent- or spectrophotometric-grade solvent and a low-lint tissue manufactured for cleaning optics. Always use lens tissue with a solvent, because dry lens tissue can scratch optical surfaces. A good solvent to use is a mix of 60% acetone† and 40% methanol. (Acetone alone dries too quickly to dissolve all of the debris.

The methanol slows the evaporation time, and also dissolves debris that acetone alone would not clean.) Isopropyl alcohol is safe and effective, but its relatively slow evaporation can leave drying marks on the optic. Cleaning your optic's edges before cleaning its faces prevents dirt from being drawn up onto the face. Wiping slowly allows the solvent to evaporate without streaking. Remember, slow and steady clean the optic.

For plastic optics and optics in plastic housings, never clean them with acetone, as this will cause damage to the plastic. Only use compressed air, reagent grade alcohol or de-ionized water to clean plastic optics. If an optical coating or substrate is unknown, err on the side of caution, and use de-ionized water and mild dish soap to avoid damage to the optic by any harsh chemicals.

†NOTE: Always use acetone-impenetrable gloves when using acetone.

The “Drop and Drag” Technique

The “drop and drag” technique is ideal for light cleaning of unmounted optics, such as our Model 51xx mirrors, and Model 580x beam pick-offs.

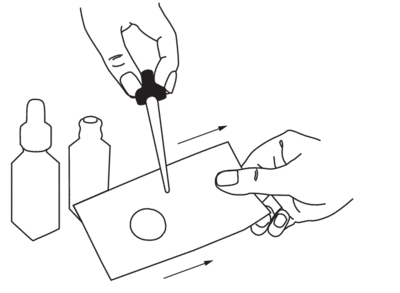
Place your optic on a clean, non-abrasive surface, such as a clean-room wiper. After blowing off the dust using compressed air or nitrogen, lay a piece of unfolded lens tissue over the optic, drop on some solvent, and slowly drag the soaked tissue across the optic's face.

hand w_wipe
Drop solvent onto your lens paper and drag the soaked tissue slowly across the optic's face. The solvent should evaporate uniformly without leaving any streaks. Remember to clean the edges of your optic before you clean the face.

The “Brush” Technique

Use the “brush” technique for small optics, such as our Model 515x mirrors and 581x beamsplitter cubes.
Wipe slowly straight across from one edge of the optic to the other.

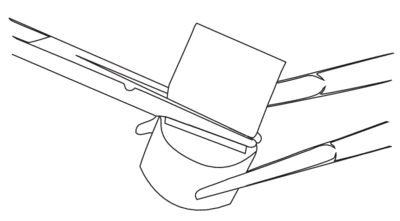
Make a lens-tissue brush by folding the lens tissue so that the fold is as wide as the optic to be cleaned. Do not touch any part of the tissue that will touch the optic. With a hemostat or tweezers, grip the folded tissue parallel to and near the fold. Wet the “brush” with acetone and shake off any excess liquid.

Blow off the dust. Place the brush on the optic surface, apply slight pressure with the hemostat, and slowly wipe straight across, from one edge of the optic surface to another.

†NOTE: When cleaning Model 581X beamsplitter cubes, avoid getting solvent into the gap between the two prisms that make up the cubes, as this will break the bond between them.

forcep wipe
Wipe slowly straight across from one edge of the optic to the other.

The “Brush” Technique for Small-Diameter or Mounted Optics

You can use a modified “brush” technique for small-diameter or mounted optics. This technique is ideal for our Models 5511 and 552x polarizers, Models 554x wave plates, and Model 572x-H aspheric lenses.

For these optics with hard-to-reach edges, make a small brush by wrapping an optic tissue around the soft tip of a synthetic low-lint swab. In one motion, “paint” the optic perimeter and sweep across the center of the optic. Wiping in a continuous motion prevents drying marks.

The “Wipe” Technique

(not recommended for metallic coatings)

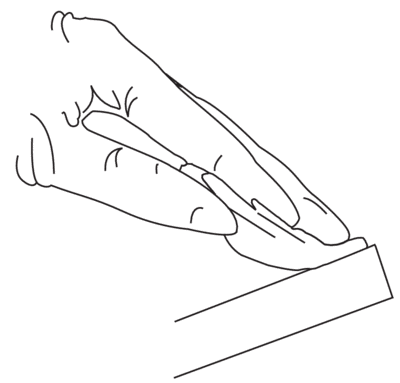
This method is useful for heavier cleaning of stubborn stains. Fold the lens tissue as described in the “brush” technique above, and grip it with your fingers instead of the hemostat.

Applying a uniform pressure on the optic edge, slowly wipe across the optic's face.

the wipe.tech
Use the “wipe” technique to remove stubborn stains on more durable coatings.

The “Immersion” Technique

For softer coatings, which damage more easily, as well as Nanotexture windows and lenses, we recommend using the “immersion” technique. Simply remove any dust from the optic and then immerse it in acetone. If the optic is very dirty, you can use an ultrasonic bath. Rinse and immerse the optic in fresh solvent a number of times until it's clean. To dry the optic, carefully blow the solvent off from one direction to avoid leaving drying marks. Please remember that cemented optics should never be cleaned by immersion. 

Cleaning Micro Optics

Micro lenses are typically lenses measuring smaller than 3 mm diameter. With their small size, they need special care and handling to avoid damage. Micro optics may be cleaned with reagent grade isopropyl alcohol, reagent grade acetone or de-ionized water, using small, delicate tweezers or a vacuum pick-up tool. Compressed air or an air blower may be used to safely remove surface dirt or debris. Do not use ultrasonic cleaning for micro optics, since it can scratch delicate micro-optic surfaces.

Cleaning Polka Dot Beamsplitters

When cleaning Polka Dot Beamsplitters, which have an aluminum coating of halftone dots on a glass substrate, please use care and do not clean these with water or solvents, as this could cause coating deterioration. If possible, use in non-condensing, dust-free environments. If dust or dirt is found, please use compressed air to gently blow the debris off of the surface.

Once You Have Cleaned Your Optic

Place the optic in the mount it will be used in or wrap it in lens tissue and place it in its container right away. Be sure to wrap each optic separately, never storing unwrapped optics together in a bag or box, as contact between the unwrapped optics could cause scratches or surface damage. Remember that optics are delicate - never store heavier items on top of your optics.

 
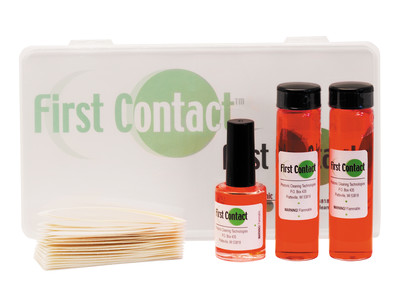
RFCR
Model RFCR red polymer optic cleaning kit

Advanced Optic Cleaning with Polymer Film

While the above optic cleaning methods work well for cleaning optics, if you want an optic clean to the atomic level without any risk of scratching or damaging your optic, a polymer optic cleaning solution is the way to go. With a polymer optic cleaner, you pour, brush or spray a designer polymer on the optic. As the polymer dries to a film, organic compounds are dissolved and particulates are encapsulated by the polymer. Peeling off the polymer film reveals a pristine optic surface that is as clean as or cleaner than new. Polymer optic cleaners can also be used on rough surfaces and gratings which can be difficult or impossible to clean using standard techniques. Please note that Nanotexture windows and lenses should never be cleaned using polymer film, only with the immersion technique or with dustoff.